How to implement CICD for IaC in practice - part 2: How to connect your Azure Devops organization securely with an Azure subscription
Introduction
Azure DevOps is a robust platform that allows developers to manage their software development life cycle (SDLC) in a streamlined and efficient manner. One of the key features of Azure DevOps is the ability to create a service connection between Azure DevOps and Azure subscription. This allows developers to automate the deployment of their code to Azure resources, such as virtual machines, web apps, and databases.
This blog post will discuss creating a service connection between Azure DevOps and Azure subscription. We will walk through the steps required to set up the connection, including creating an Azure service principal, granting permissions, and configuring the connection in Azure DevOps.
Streamline Your Deployment Process: How to Connect Azure DevOps to Azure Subscription
Step 0: Create an Azure resource group
Creating an Azure resource group with Azure CLI (az cli) is a simple process that allows you to manage your resources in Azure more efficiently. To create an Azure resource group, you must first install Azure CLI on your machine and sign in to your Azure account. Once you have done this, you can use the following command to create a resource group:
az group create --name <resource group name> --location <region>
For example, if you want to create a resource group named "MyResourceGroup" in the "West US" region, you would use the following command:
az group create --name MyResourceGroup --location WestUS
Step 1: Create an Azure service principal
The first step in creating a service connection between Azure DevOps and Azure subscription is to create an Azure service principal. A service principal is an identity used to authenticate an application or service in Azure. This can be used to grant permissions to Azure resources, such as virtual machines, web apps, and databases.
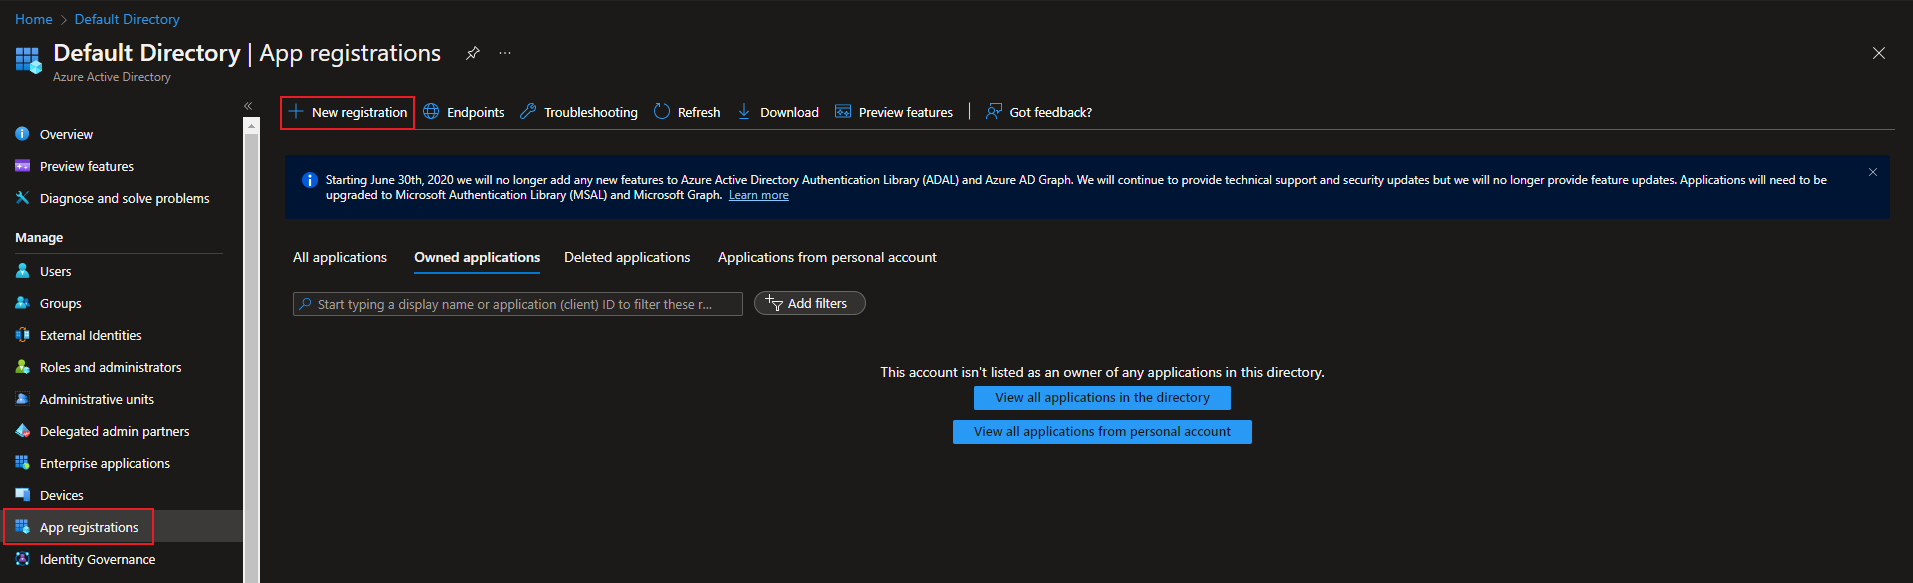
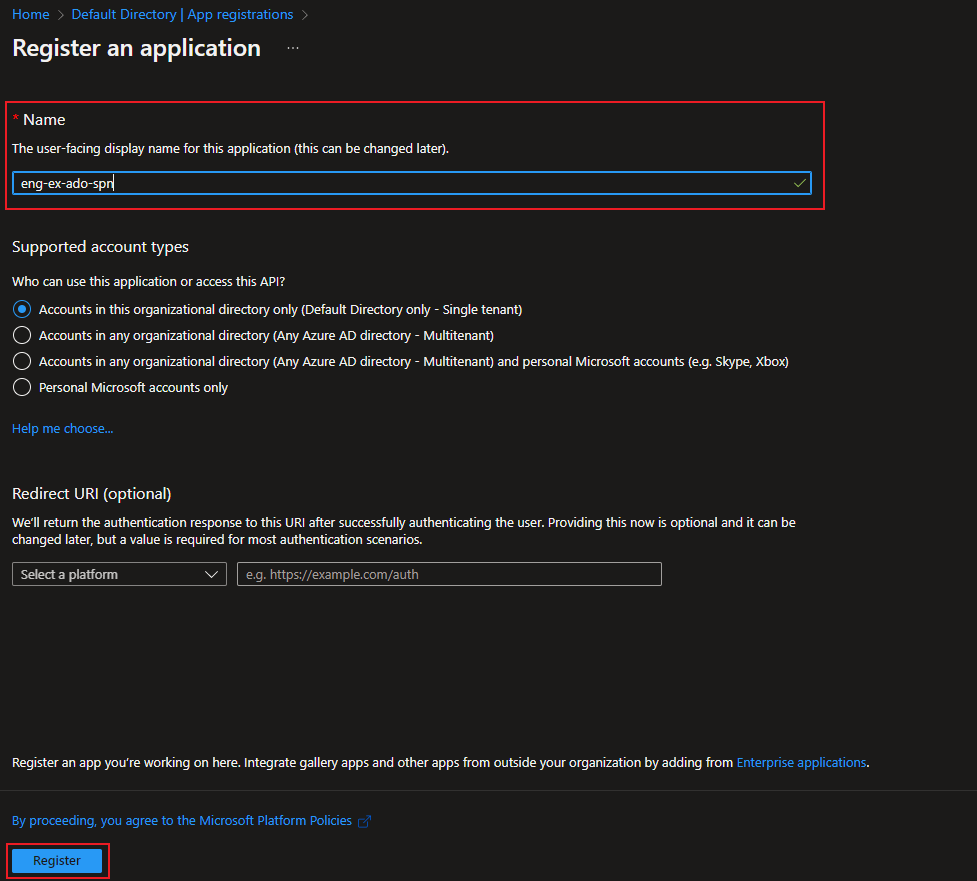
To create an Azure service principal, you must have an Azure subscription and be logged in to the Azure portal. Once logged in, navigate to the Azure Active Directory section of the portal, and select "App registrations." Click on the "New Registration" button and enter a name for the service principal.
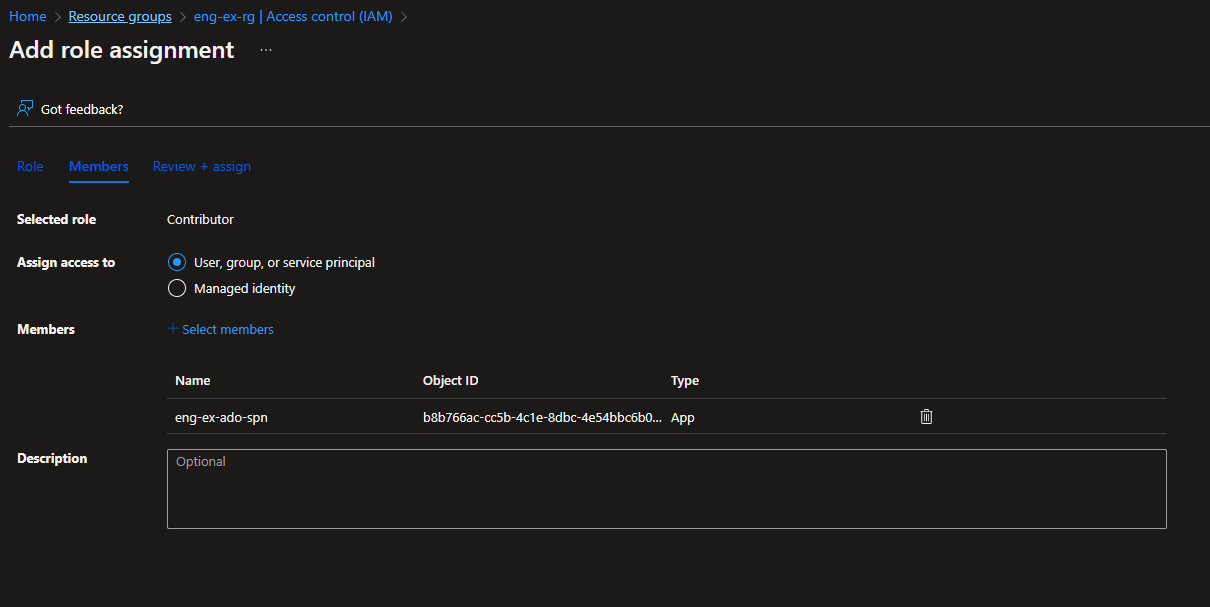
Step 2: Grant permissions to the service principal
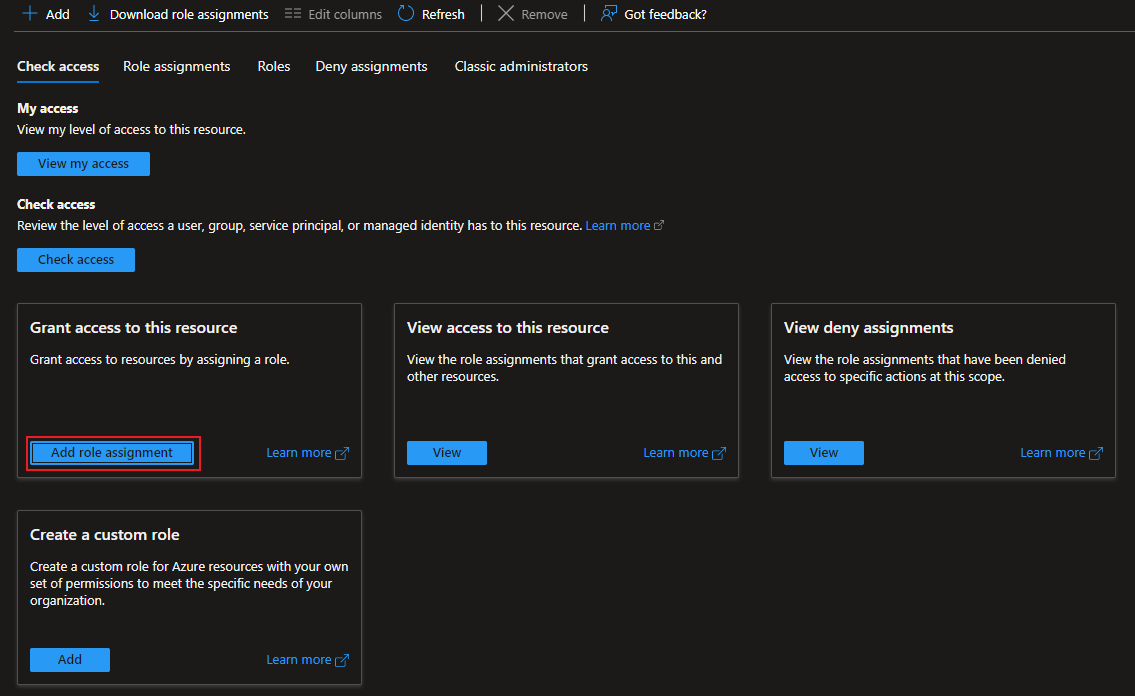
Once the service principal has been created, you will need to permit it to the Azure resources with which it will interact. To do this, navigate to the Azure resource you want to grant permissions, such as a virtual machine or web app, and select the "Access control (IAM)" option.
Select the role you want to assign to the service principal, such as "Owner" or "Contributor." Click the "Add" button and select the "Add role assignment" option. Enter the name of the service principal you created in the previous step, and click on the "Save" button.
Alternatively, we can combine steps 1 and 3 with one az cli command.
az ad sp create-for-rbac --name myServicePrincipalName \
--role roleName \
--scopes /subscriptions/mySubscriptionID/resourceGroups/myResourceGroupName
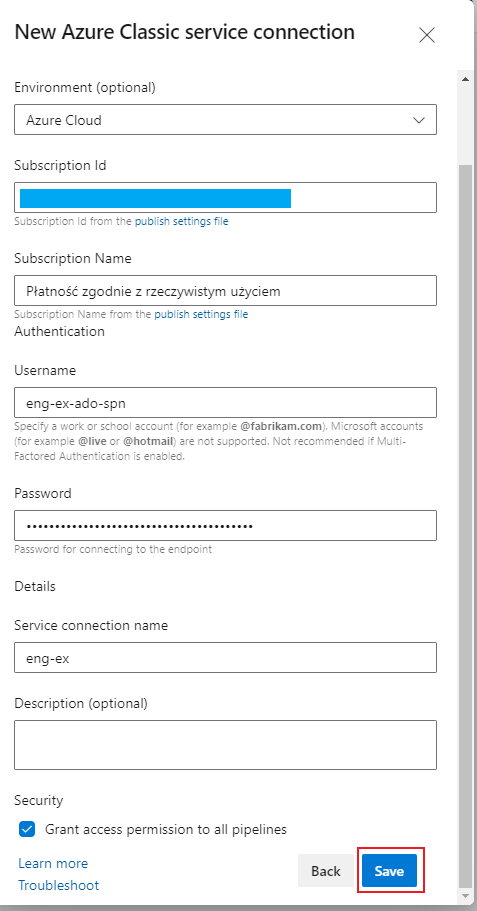
Step 3: Configure the service connection in Azure DevOps
Once the service principal has been created and permissions have been granted, you can configure the service connection in Azure DevOps. To do this, navigate to the Azure DevOps project that you want to connect to Azure, and select the "Project settings" option.
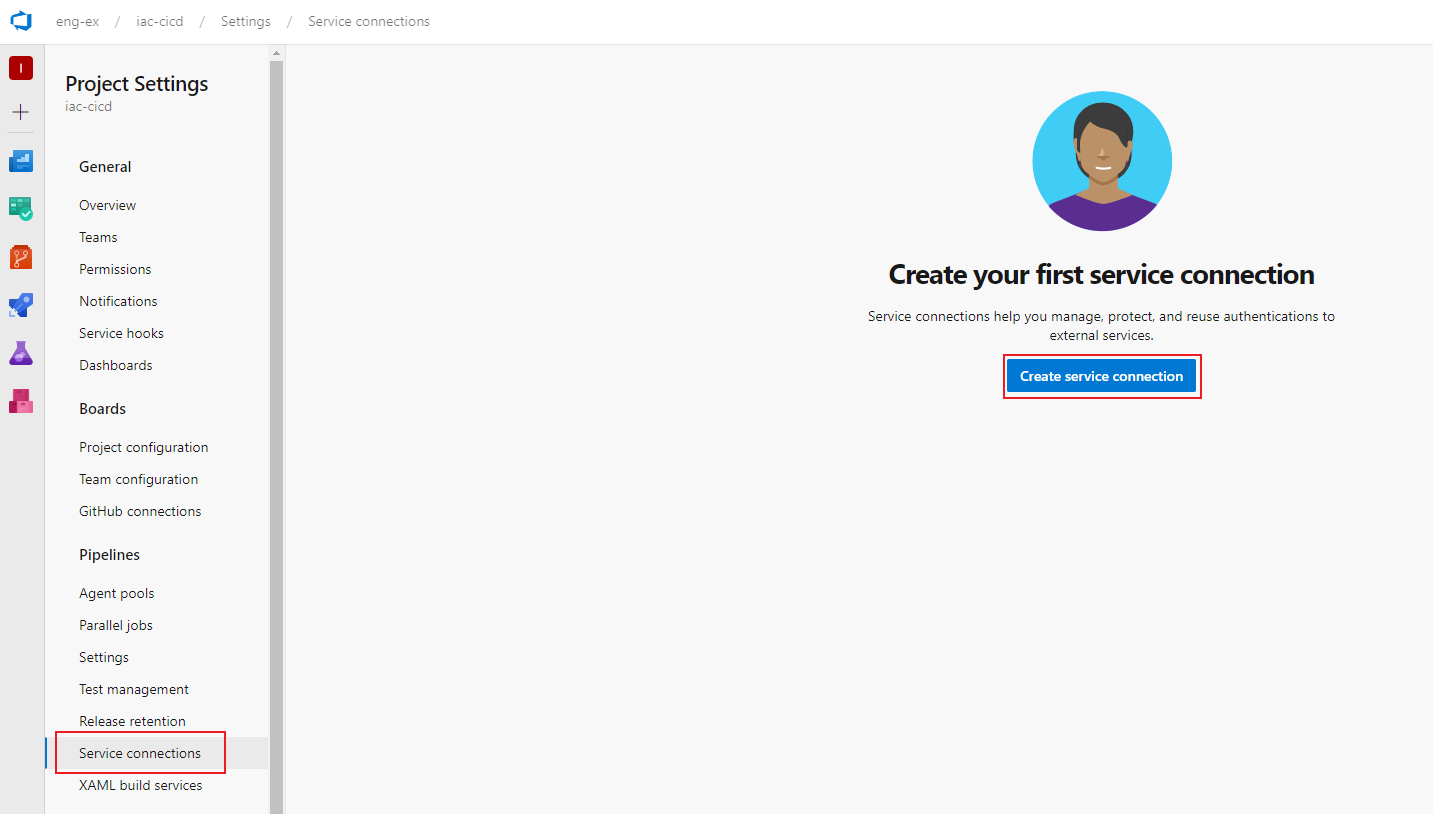
Click on the "Service connections" option and select the "New service connection" button. Select the "Azure Resource Manager" option and enter the name of the service principal you created in the previous step. Click the "Verify connection" button to ensure the connection is configured correctly.
Step 4: Create a pipeline in Azure DevOps
Now that the service connection has been configured, you can create a pipeline in Azure DevOps to deploy your code to Azure resources. To do this, navigate to the Azure DevOps project that you want to connect to Azure and select the "Pipelines" option.
Click on the "New pipeline" button and select the type of pipeline you want to create, such as "Azure App Service." Follow the prompts to configure the pipeline, including selecting the Azure resource you wish to deploy and configuring the deployment options.
Summary
Creating a service connection between Azure DevOps and Azure subscription is a powerful way to automate the deployment of your code to Azure resources. Following the steps outlined in this blog post, you can create an Azure service principal, grant permissions, configure the service connection in Azure DevOps, and create a pipeline to deploy your code to Azure resources.